Grow Tube Installation
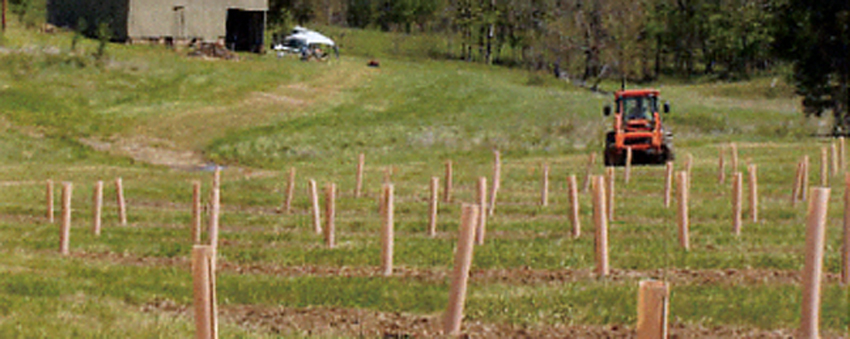
Quick methods to form a grow tube with the full diameter – for best growth of your grapevines!
1. Quick Tying
Push a length of tying material through the tabs on each end of the grow tube. Complete installation by wrapping top tie around the stake. (The bottom tie should be tied to itself) Optimal diameter of tube, once fastened shut, should be 3.5.
2. Staple
To form correct diameter (for best growth) place tube edge against tab on opposite side. Staple to permanently secure. Tie grow tube to stake or wire. Do not crush grow tube.
3. Pencil Rod
Line up the holes (be sure your diameter is 3.5) formed by opening the tabs. Push a 1/4″ pencil rod through the hole from the inside to outside. Push the rod through almost to the other end. Line up bottom holes. Push rod through bottom holes. Complete installation by pushing bottom of rod into soil and attaching to to trellis wire.
After tying and securing to stake or wire, mound up dirt around bottom of grow tube.
We sell the TUBEX Vinegro Double Wall Clipper Grow Tube.
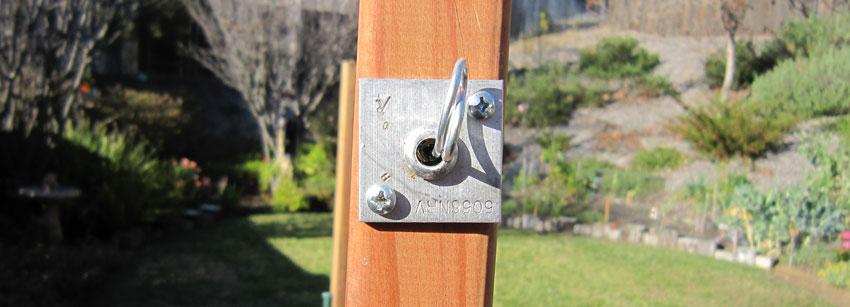
WireVise™ Installation
-
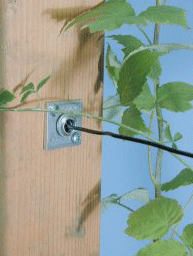 A hole is drilled in the end post or fence post for the wire.
 -
The Wirevise is then inserted into one end of the post hole.
-
The wire is then inserted through the other end of the post hole through the Wirevise which automatically holds the wire by its unique patented jaw system.
-
Tension is then applied by pulling the wire through the Wirevise using a claw hammer.
-
Excess wire should be bent sideways or downward.
Retensioning
To increase the tension of the wire at any time, just pull the wire through the Wirevise using one of the tensioning tools mentioned above.
We carry the WireVise Anchor System.
Grapefork Harvesting Tool
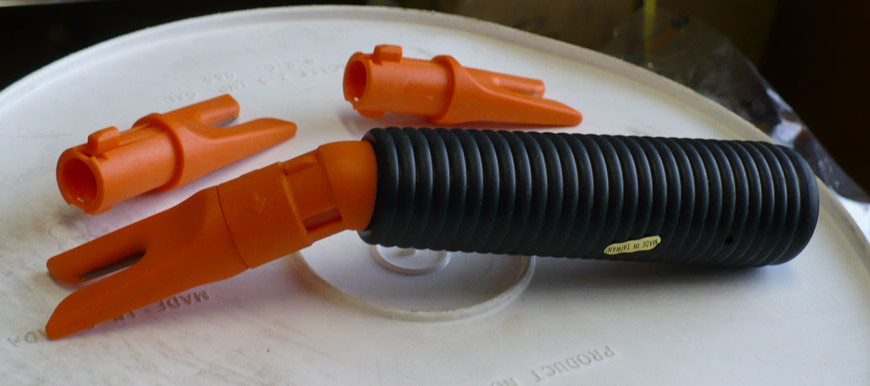
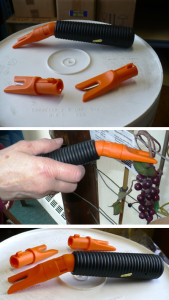
- No springs to break or blades to sharpen.
- The grape picker’s hand will not be as fatigued or pinched as occurs with repeated grasping of conventional shears.
- Fingers are not likely to be lacerated. The cutting head design does not allow fingers into the blade area.
- Grapevines can not be damaged by overzealous pickers.
- Simple care: wash with soap and water.
- No lubrication needed as there are no moving parts.
- No rust to worry about. When cutting head wears out (after about three tough days of harvesting), pop the head out and click in a new one. It’s simple! It’s tool-less!
- The cutting head can be positioned either perpendicular or parallel to the bend in the tool. Thus the blade orientation can adapt to the grape picker’s preference when harvesting waist high fruit (VSP) or higher trained fruit (GDC).
- Ergonomic bend in tool makes it easier to reach grape clusters. It also allows for greater leverage, or torque, for severing highly lignified cluster stems.
- The Grapefork Harvesting Tool is fast. Test rated the Grapefork Tool 10%-25% faster than shears when harvesting Cabernet Sauvignon. We sell the replacement for the Grapefork – the Cluster Cutter.